![Creative Commons BY-NC-SA 3.0 Unported License [Creative Commons BY-NC-SA 3.0 Unported License]](http://www.obdurodon.org/images/cc/88x31.png) Last modified:
2021-12-27T22:03:55+0000
Last modified:
2021-12-27T22:03:55+0000
Author: Mako Ishikawa (mai35@pitt.edu)
Maintained by: David J. Birnbaum (djbpitt@gmail.com)
![Creative Commons BY-NC-SA 3.0 Unported License [Creative Commons BY-NC-SA 3.0 Unported License]](http://www.obdurodon.org/images/cc/88x31.png) Last modified:
2021-12-27T22:03:55+0000
Last modified:
2021-12-27T22:03:55+0000
Since we first wrote this tutorial we’ve run into occasional problems with subsetting
(the selective inclusion and exclusion of specific glyph ranges) on Font Squirrel.
If you find that Font Squirrel omits parts of your font even with the expert
setting and no subsetting
selected, try the alternative described at How to create perfect web-fonts in 3 steps or the online Fontie tool mentioned there.
Web pages are typically rendered with fonts installed on the user’s machine. Web
browsers are preconfigured to use certain default fonts, and developers can override
those preconfigurations by specifying alternative fonts with the CSS
font-family property. Until the advent of webfonts, though, a font
specified in the CSS would be used only if it was available on the user’s machine.
That means that it had to be a system font (available by default) or the user had to
have installed it explicitly. Not all users know how to install fonts, it isn’t
possible to install fonts on machines without the necessary permissions (for
example, you can’t install fonts on a University lab machine), and some operating
systems (such as iOS) do not permit the installation of fonts at all.
Webfonts overcome those limitations by allowing the web server (such as Obdurodon) to deliver fonts specified by the developer as part of the page. The user doesn’t have to downland and install the webfonts explicitly, and doesn’t even have to know that the site uses webfonts. This is similar to the way CSS and JavaScript resources are delivered; webfonts are downloaded automatically along with a page that uses them, and their existence is transparent to the end user.
This page is designed to introduce you to using webfonts within your own HTML to allow for customized fonts, should you wish to do that to enhance the design of your project site by using special fonts that are appropriate for your topic or theme. Webfonts may also serve an informatic, and not just aesthetic function. For some project sites that use uncommon writing systems that are not well supported by default system fonts, webfonts may be the only way to render legible text on all devices, including iOS devices, which do not permit the system-level installation of non-system fonts.
When your browser downloads a webfont as part of a page, the font is usually available in several formats because different browsers prefer different formats. Font Squirrel has the ability to take any font file you provide in regular TrueType (ttf) format and generate those several alternative formats. You then install the webfont files and a bit of CSS on your site, and your users will be able to see your pages with the webfonts you intended. This tutorial explains how to create webfonts in different formats using Font Squirrel and how to install the webfonts on your project site so that they will work with your project HTML files.
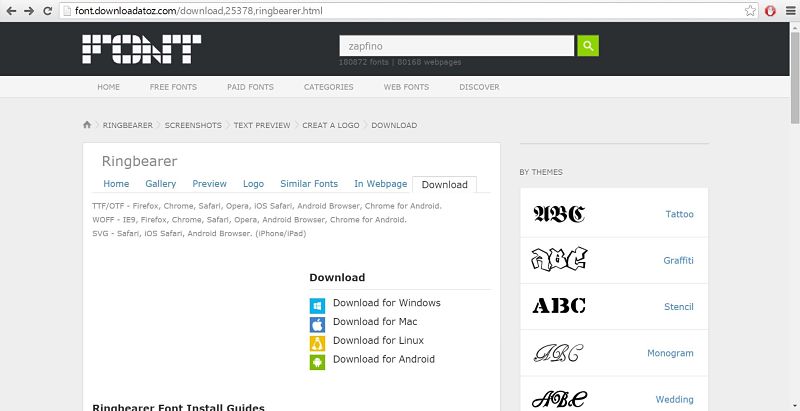
If you know how to design your own fonts, you can do that, but most users will create webfonts by finding fonts they like online (typically only in TrueType format), downloading them, and then using Font Squirrel to convert them to a webfont kit. You find fonts available for free download on sites like Free fonts download, and for this tutorial, we'll download the Ringbearer font from this site. For your own projects you can use the search tool to find fonts that suit your particular needs.
In the screen shot below, we searched for Dragon Age II fonts and
clicked on the Download
button.

There are also instructions on the page for downloading the font for different platforms, so choose the one that’s correct for you (Windows, Mac, Linux, Android), as illustrated in the screen shot below:
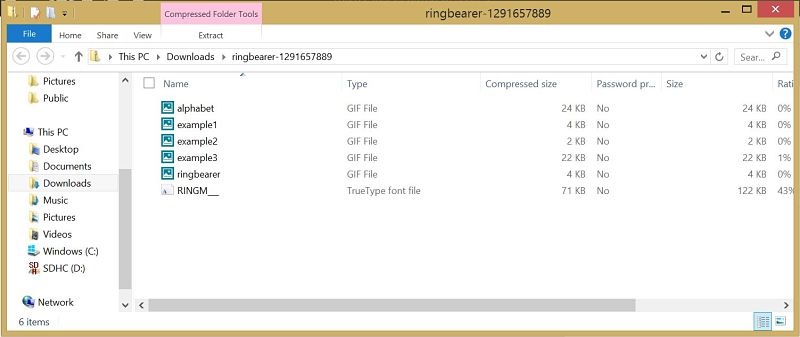
Once you’ve downloaded the font file, open it and you will find that it contains a number of GIF files, and a font file (a TrueType font file in our example). You can ignore everything except the font file, which is the only one you need to use for Font Squirrel.
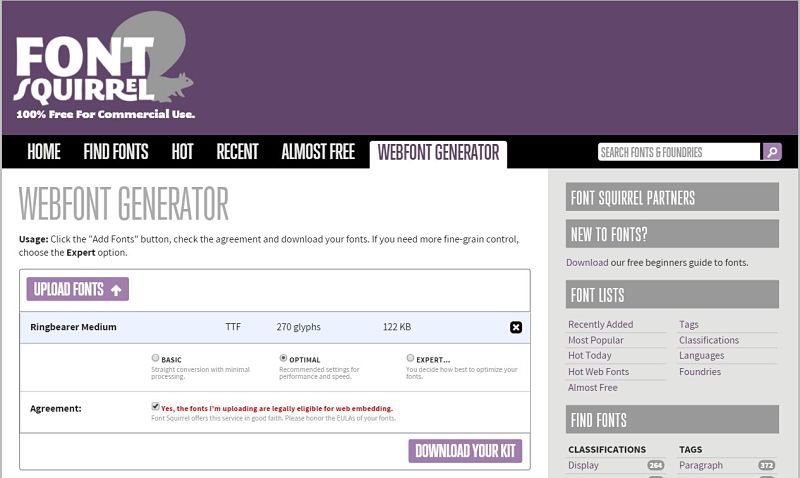
Once you’ve acquired a font in TrueType format that you want to use as a webfont, it’s time to go to the Font Squirrel webfont generator.
The link provided in the last section should take you to this page:
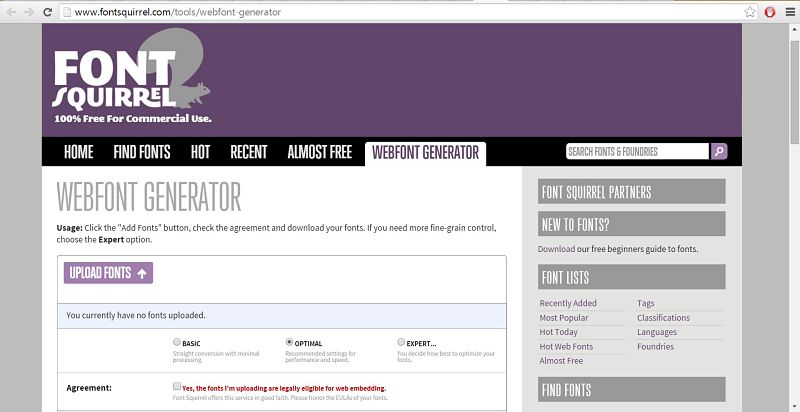
Once you’re on this page, click on the Upload fonts
button. Then navigate to
the font file that you previously downloaded and open the file. In our case, we are
opening the TrueType font file of Ringbearer.
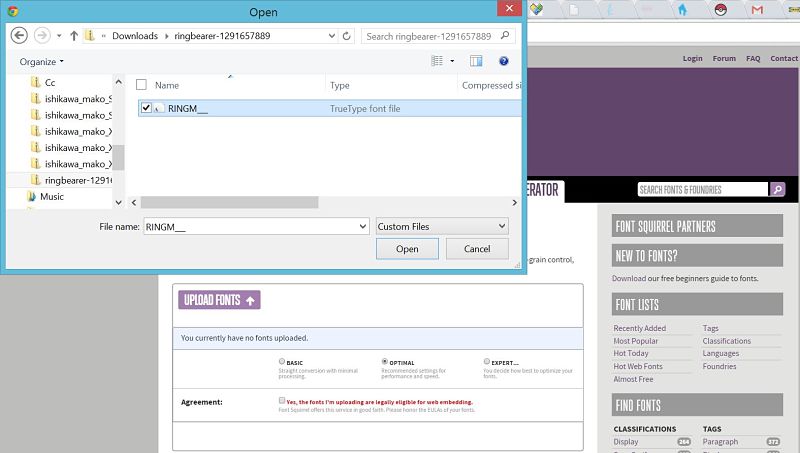
Once you’ve opened the file, check the Agreement that the fonts you are uploading are
legally eligible for web embedding (after making sure that they actually are). Once
you check the Agreement box, you should be able to click the Download your
kit
button. You can normally accept all of the default settings, but there
are a few special circumstances that require special settings, so if you accept the
defaults and your font doesn’t come out right, let us know and we’ll help you
troubleshoot. When you click on the button, Font Squirrel will create and download
the various font files from the file you provided. This may take a little while,
from thirty seconds to several minutes, so don’t worry if the download doesn’t
finish (or even start) immediately.
When Font Squirrel finishes downloading your kit, open it up and you will see something like this:
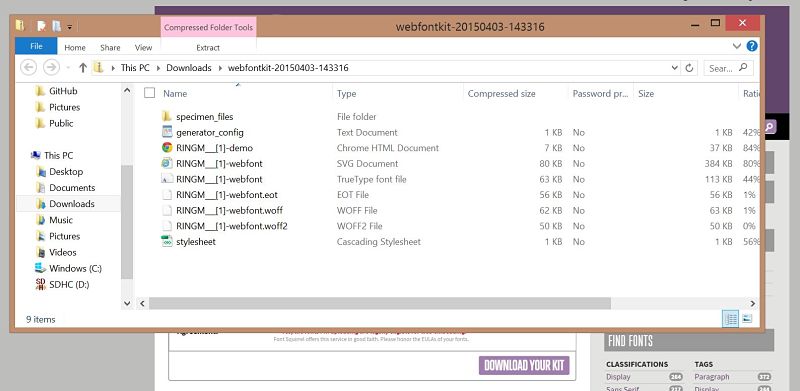
Inside the folder, you will find TrueType, EOT, WOFF, WOFF2, and SVG font files among
others. Those are the actual webfont files (yes, it is possible to create font files
in SVG format, and Font Squirrel does that), which you need to make available on
your project site. You will also find a CSS file that contains the
@font-face CSS rule for the webfont files you just created and
downloaded. We will be using this @font-face rule for the CSS for our
code. You can read more about this rule at the W3
schools.
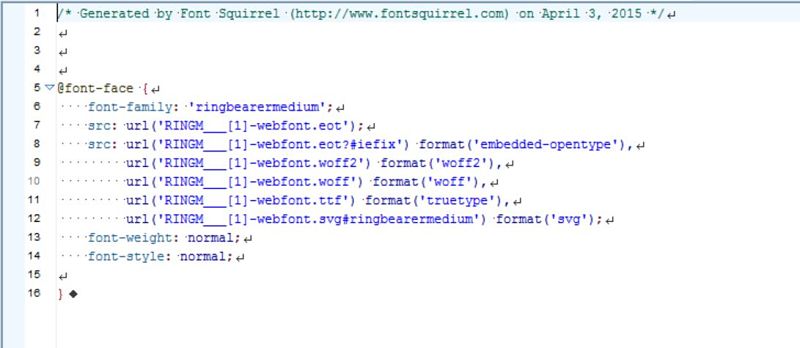
After creating and downloading webfont files from Font Squirrel, you need to install them in your project site and tell your web pages to use them. To do that, begin by uploading the webfont files themselves (the eot, woff, woff2, ttf, and svg files that were part of your kit) to the CSS directory for your project site.
Uploading the font files to your CSS project directory makes the fonts available to
users in principle, but you also have to modify your CSS to specify where they
should be used on your pages. To do that, copy the @font-face rule
provided by the CSS file you downloaded and paste it into your general CSS file. The
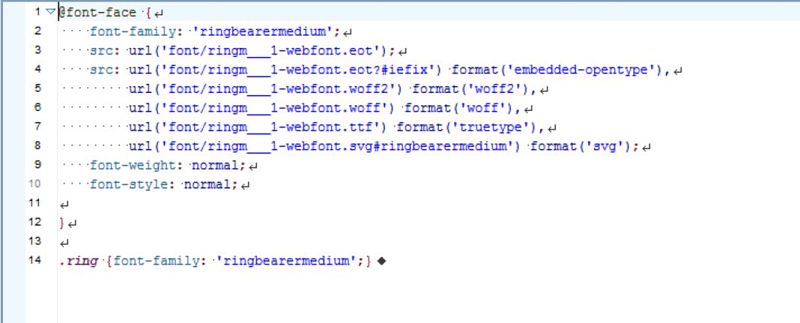
font-family name included in the @font-face rule (on
the second line in the screen shot below; in our case, it’s ringbearermedium
)
is the name you should use as the value of the font-family property in
your CSS for text to apply the webfont. For example, in our case, we have a class
called ring
for our HTML. To render all elements that belong to that class in
our HTML using our webfont, we can add the following line to our CSS (in the last
line of the screen shot below):
.ring {font-family: 'ringbearermedium'}
We can simply add the font-family property to the CSS code for our "ring" class.
And we’re done! Because we’ve provided all the potential webfont file types, the webfont you used should be viewable in any browser and provide for a pleasant user experience on your site.
On-line web font services some and go, but http://modernwpthemes.com/free-online-font-face-generator-and-converter provides a list of 5 available in July 2017. MacOS users can install fontplop. Webify is platform-independent and has precompiled binaries. See also css3FontConverter (described at Converting @font-face fonts quickly in any OS).